The recommended way to install the plugin is from OpenUPM, but it can also be installed manually.
OpenUPM
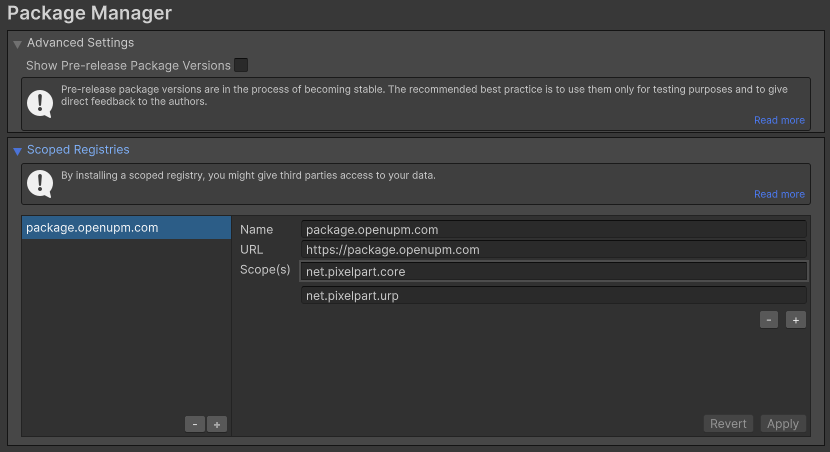
- In Unity, open Edit/Project Settings/Package Manager and add OpenUPM as a Scoped Registry. See openupm.com for further information.
Scoped registries
- In the Unity Package Manager, click
+, then Install package by name....
- Put net.pixelpart.core into the Name field and the exact required version of the plugin (e.g. 1.8.1) into the Version field. Then, click
Install.
- If the project uses the Universal Rendering Pipeline (URP), additionally install the package net.pixelpart.urp in the same way. Make sure to add net.pixelpart.urp as a Scope in the Package Manager settings beforehand.
- If the project uses the High-Definition Rendering Pipeline (HDRP), additionally install the package net.pixelpart.hdrp in the same way. Make sure to add net.pixelpart.hdrp as a Scope in the Package Manager settings beforehand.
Manual Install
- Download the plugin from the Pixelpart website and extract the archive.
- Start the Unity editor and open the project where you want to use Pixelpart.
- Install the base plugin package net.pixelpart.core.tgz with the Unity Package Manager. See docs.unity3d.com for more details.
- If the project uses the Universal Rendering Pipeline (URP), additionally install the package net.pixelpart.urp.tgz.
- If the project uses the High-Definition Rendering Pipeline (HDRP), additionally install the package net.pixelpart.hdrp.tgz.